
HOPR > Left Navigation Bar > Settings > Assets
Follow the workflow mentioned above to land on the Assets screen.
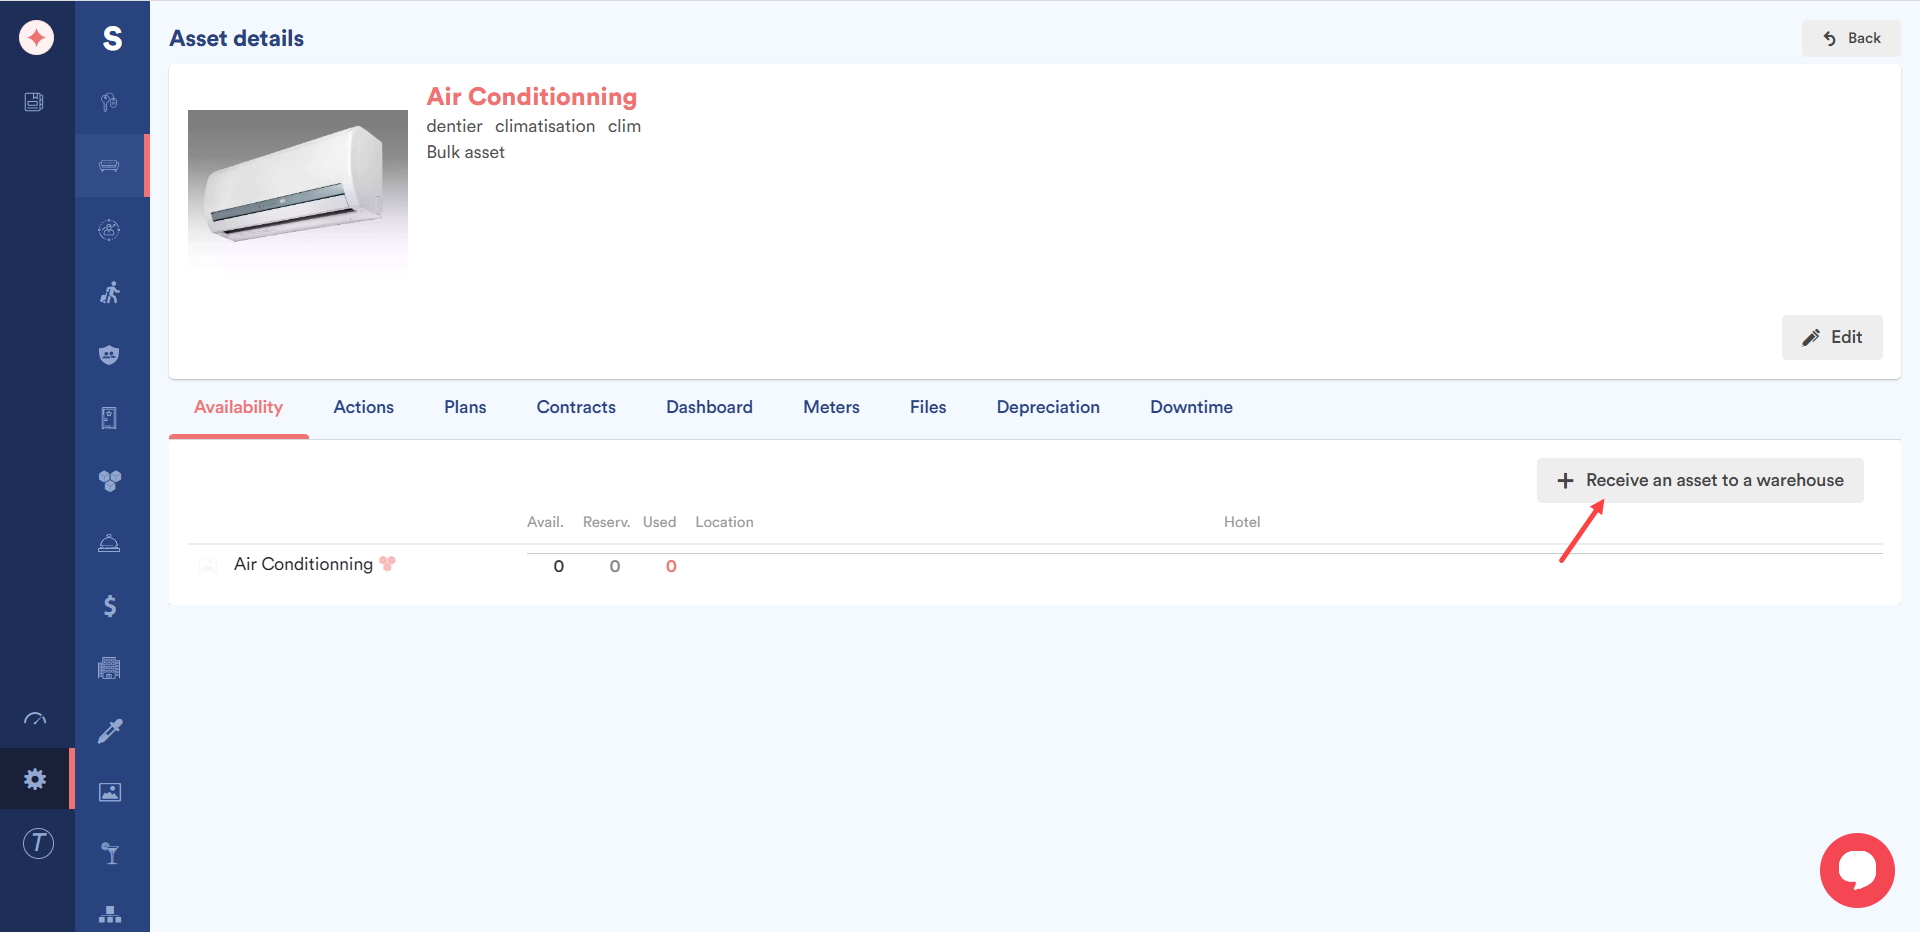
Click the asset name for the asset you want to receive. Doing so takes you to the selected asset's details screen.
In the Availability tab, click the +Receive an asset to a warehouse button. This opens the receive an asset window.
The selected asset is auto-populated in the Asset field and this field is read-only.

Similarly, the associated warehouse is auto-populated in the Receive to warehouse dropdown. This is also read-only.
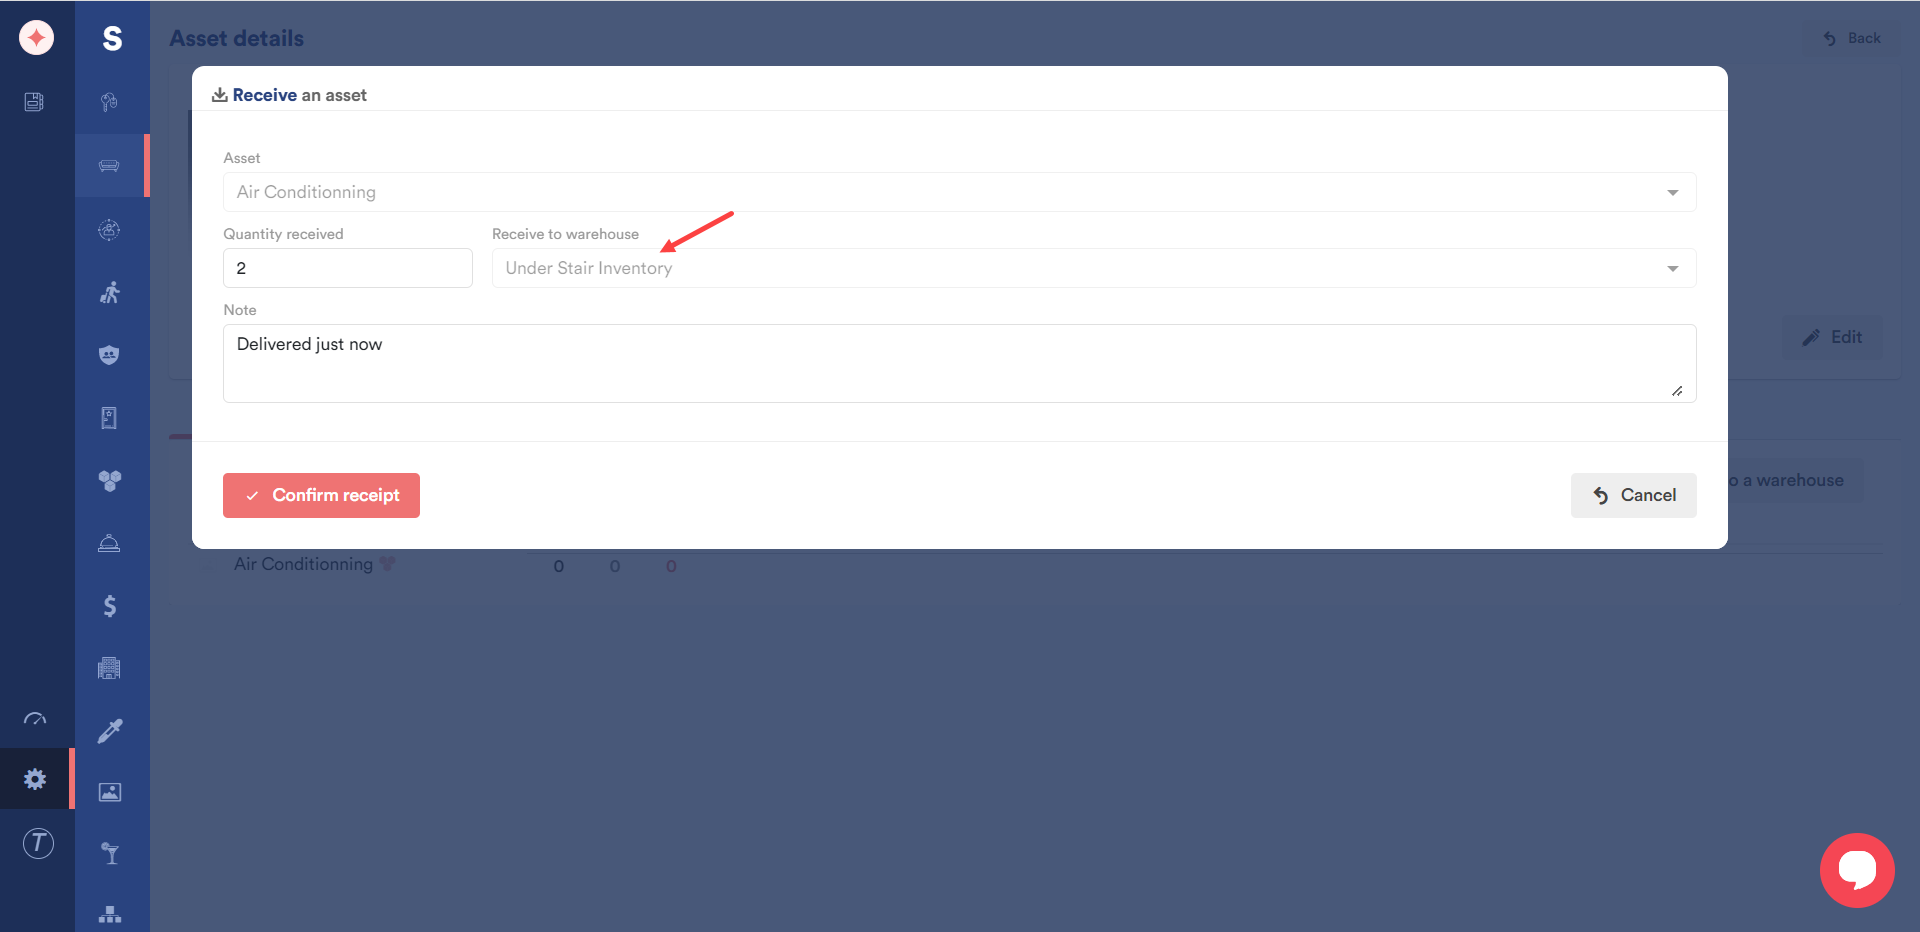
Enter the received quantity of the selected asset using the Quantity received field.

Any additional instructions can be recorded using the Notes field.
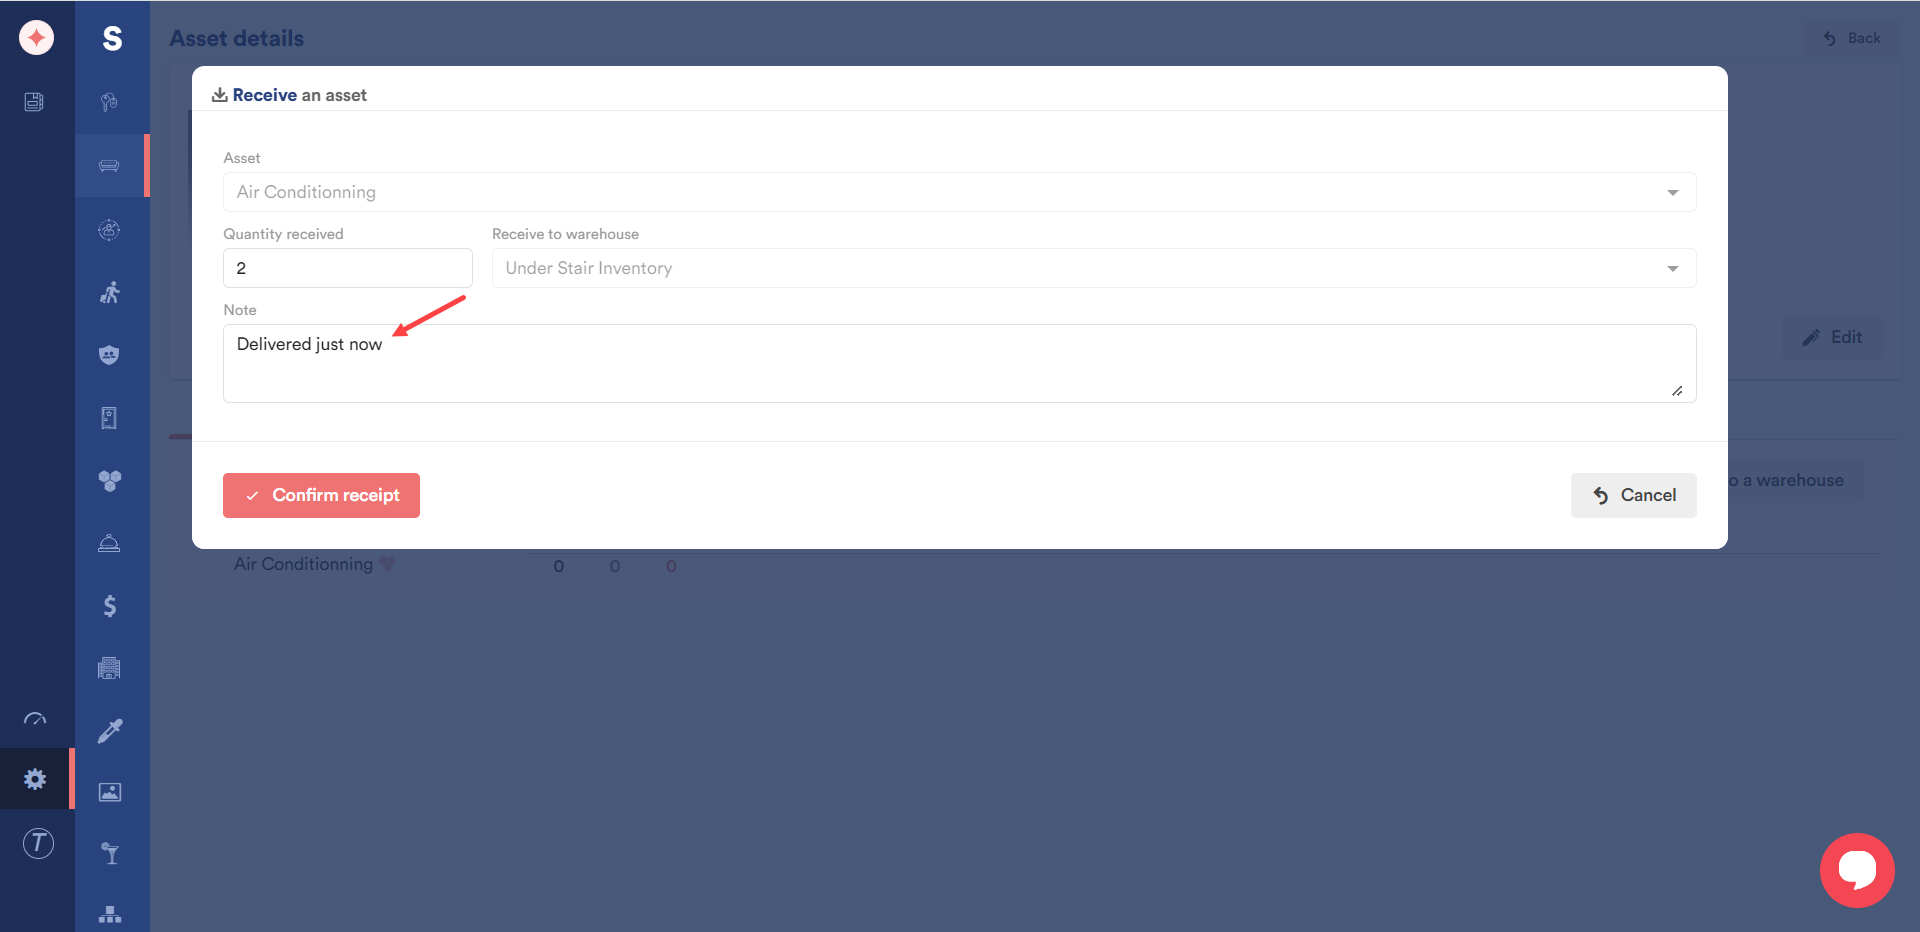
Once the required details are recorded, click the Confirm Receipt button.

Leave a Reply