
HOPR > Left Navigation Bar > Settings > Rooms
Follow the above-mentioned workflow to land on the Room management screen.
Click the room tile for the room you want to edit. Doing so opens the Room details screen.
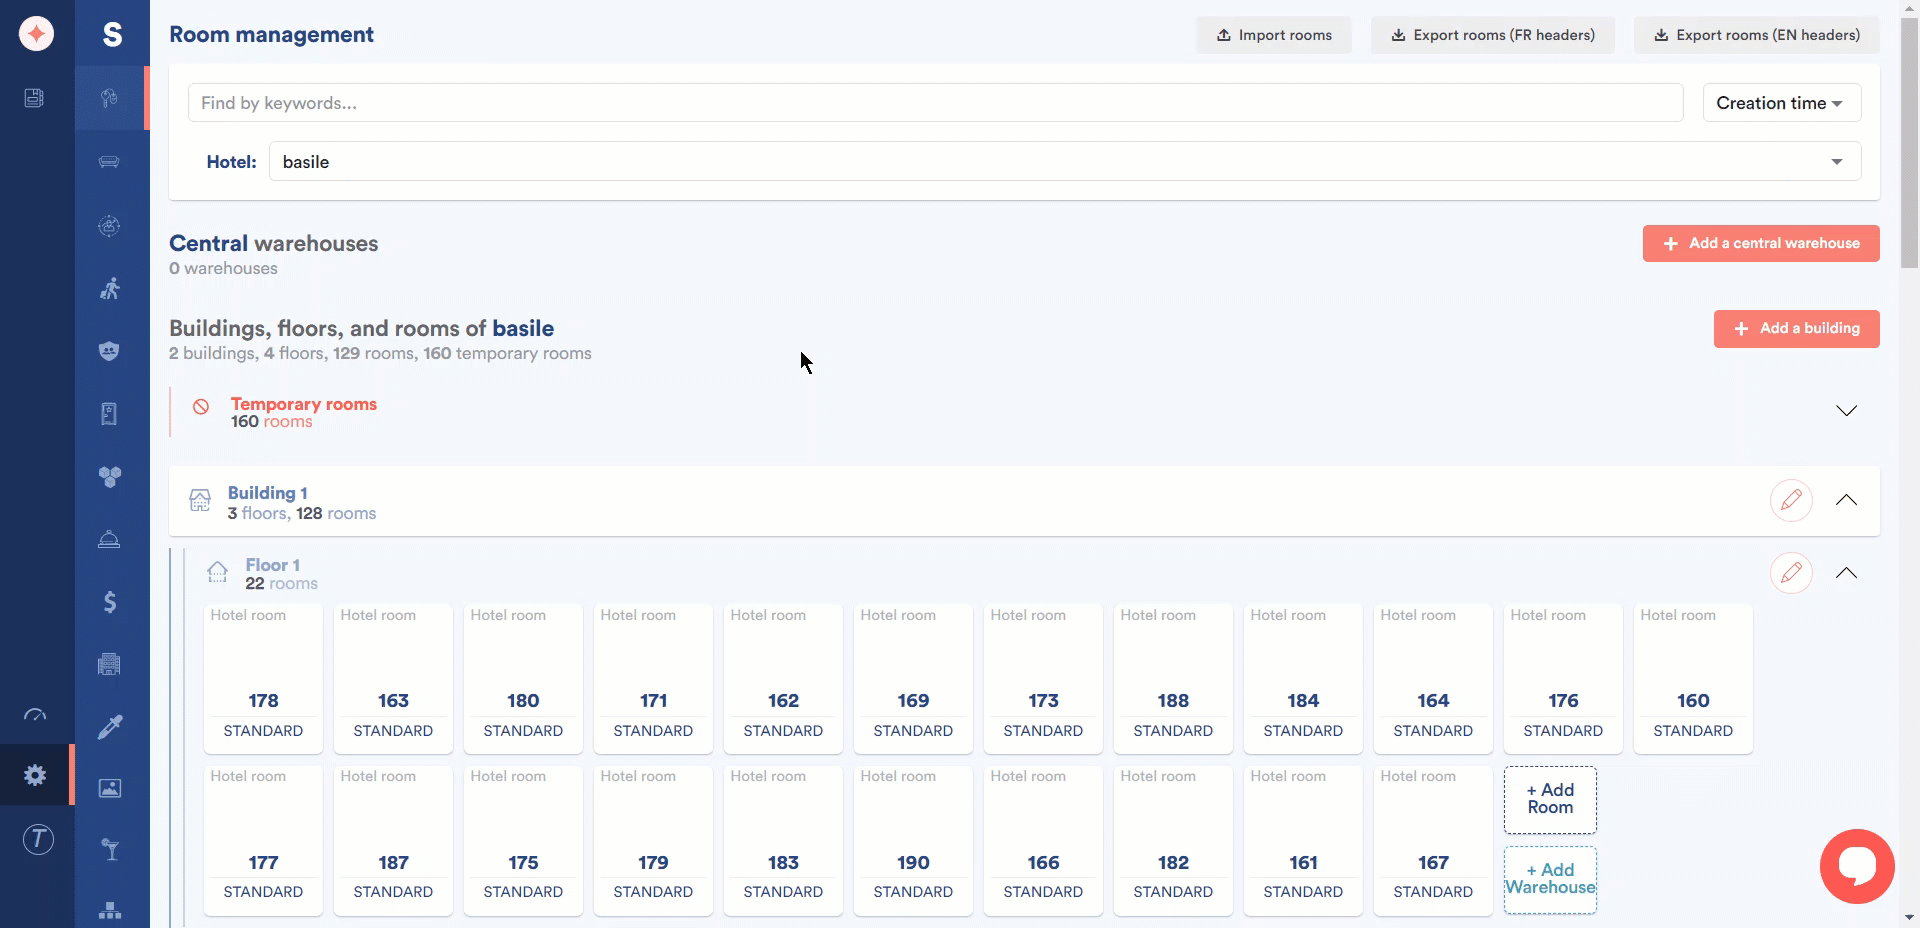
Here, all the components associated to the room are listed via individual tabs. They include External Information, Assets, Catalog, Inventory, History, Notes, Minibar, and Asset sets. You can open the tab for which you want to make changes.
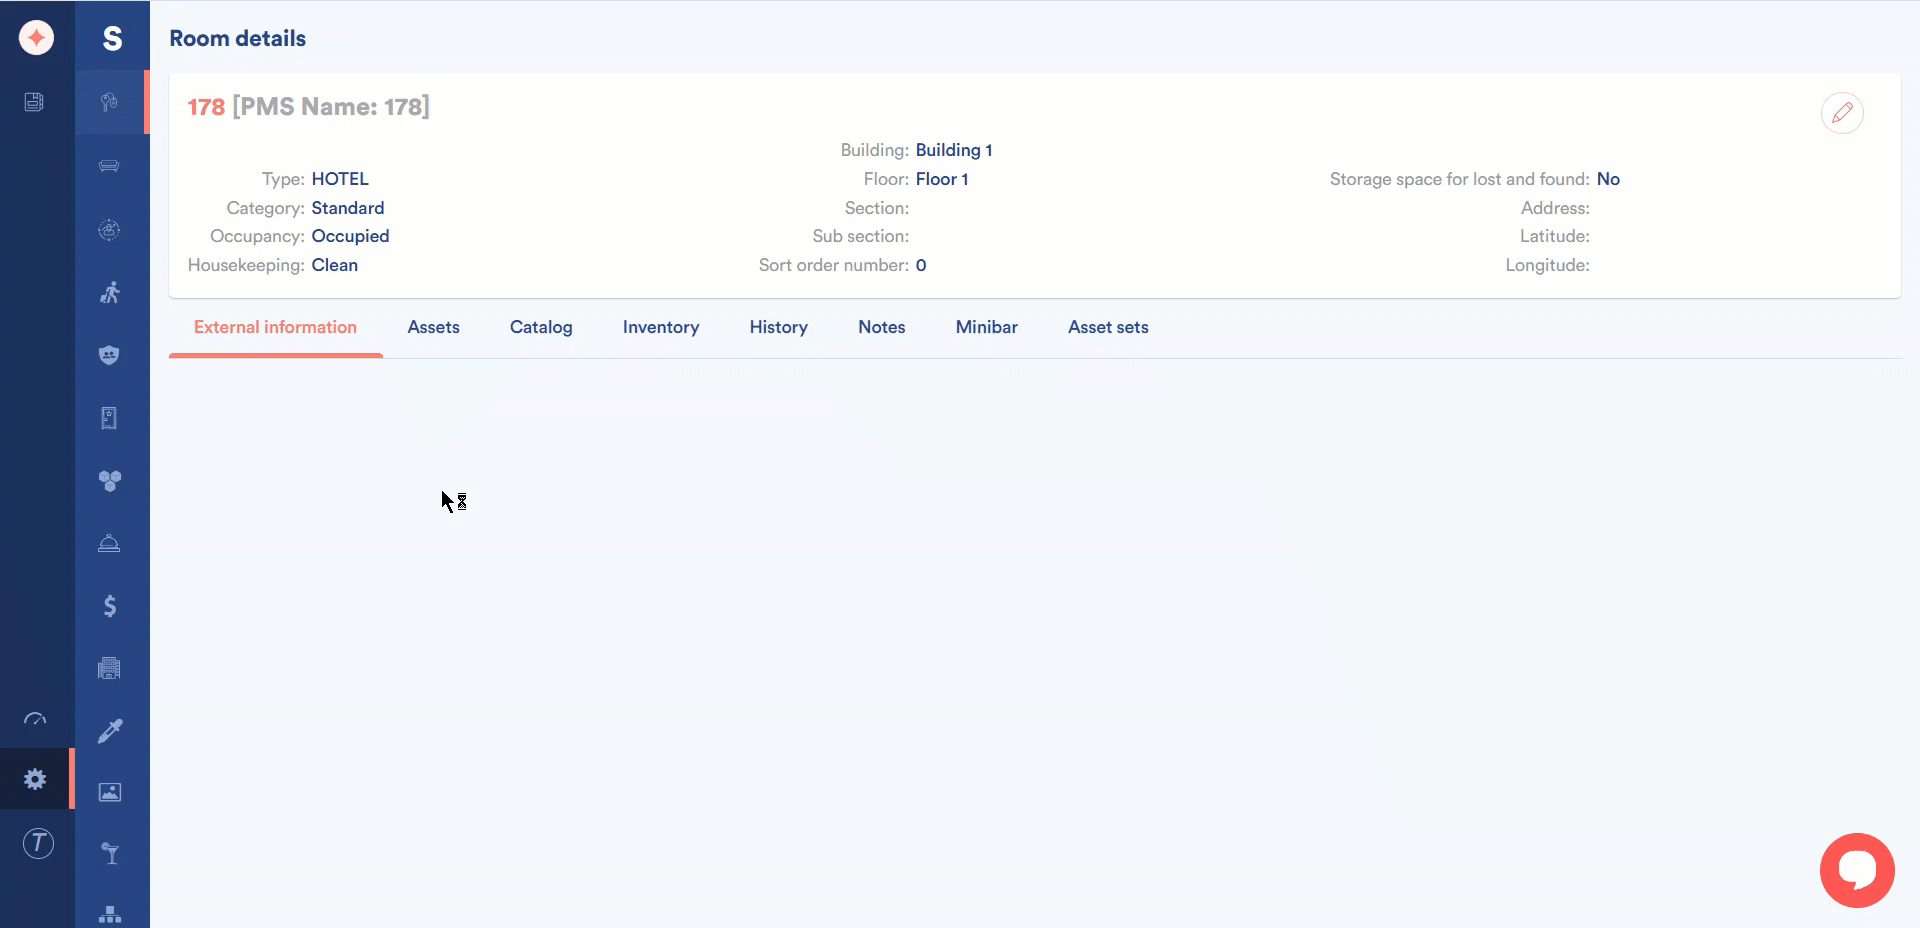
In the Minibar tab, you can use minibar templates by clicking the Apply Template button.
These templates are created in the Minibar template settings. To know how that is done, please visit the How to Create a Minibar Template? article.
Similarly, asset sets that have been created can be viewed and associated using the Asset sets tab.

Asset sets populated here are created from Asset sets settings. You can read about how they are created by visiting the How to Create an Asset Set? article.
Moreover, in case you want to use a different room in the HOPR system for the selected room, you can record it using the pencil icon to edit.
In case you choose an apartment to edit, the only difference is the Property Information section.
Leave a Reply