
HOPR > Left Navigation Bar > Management > Found Items
Follow the workflow mentioned above to land on the Found Items screen.
Click the +Create New Found Item button located at the top-right corner of the screen. This opens the Create a new found item panel on the right side of the screen.
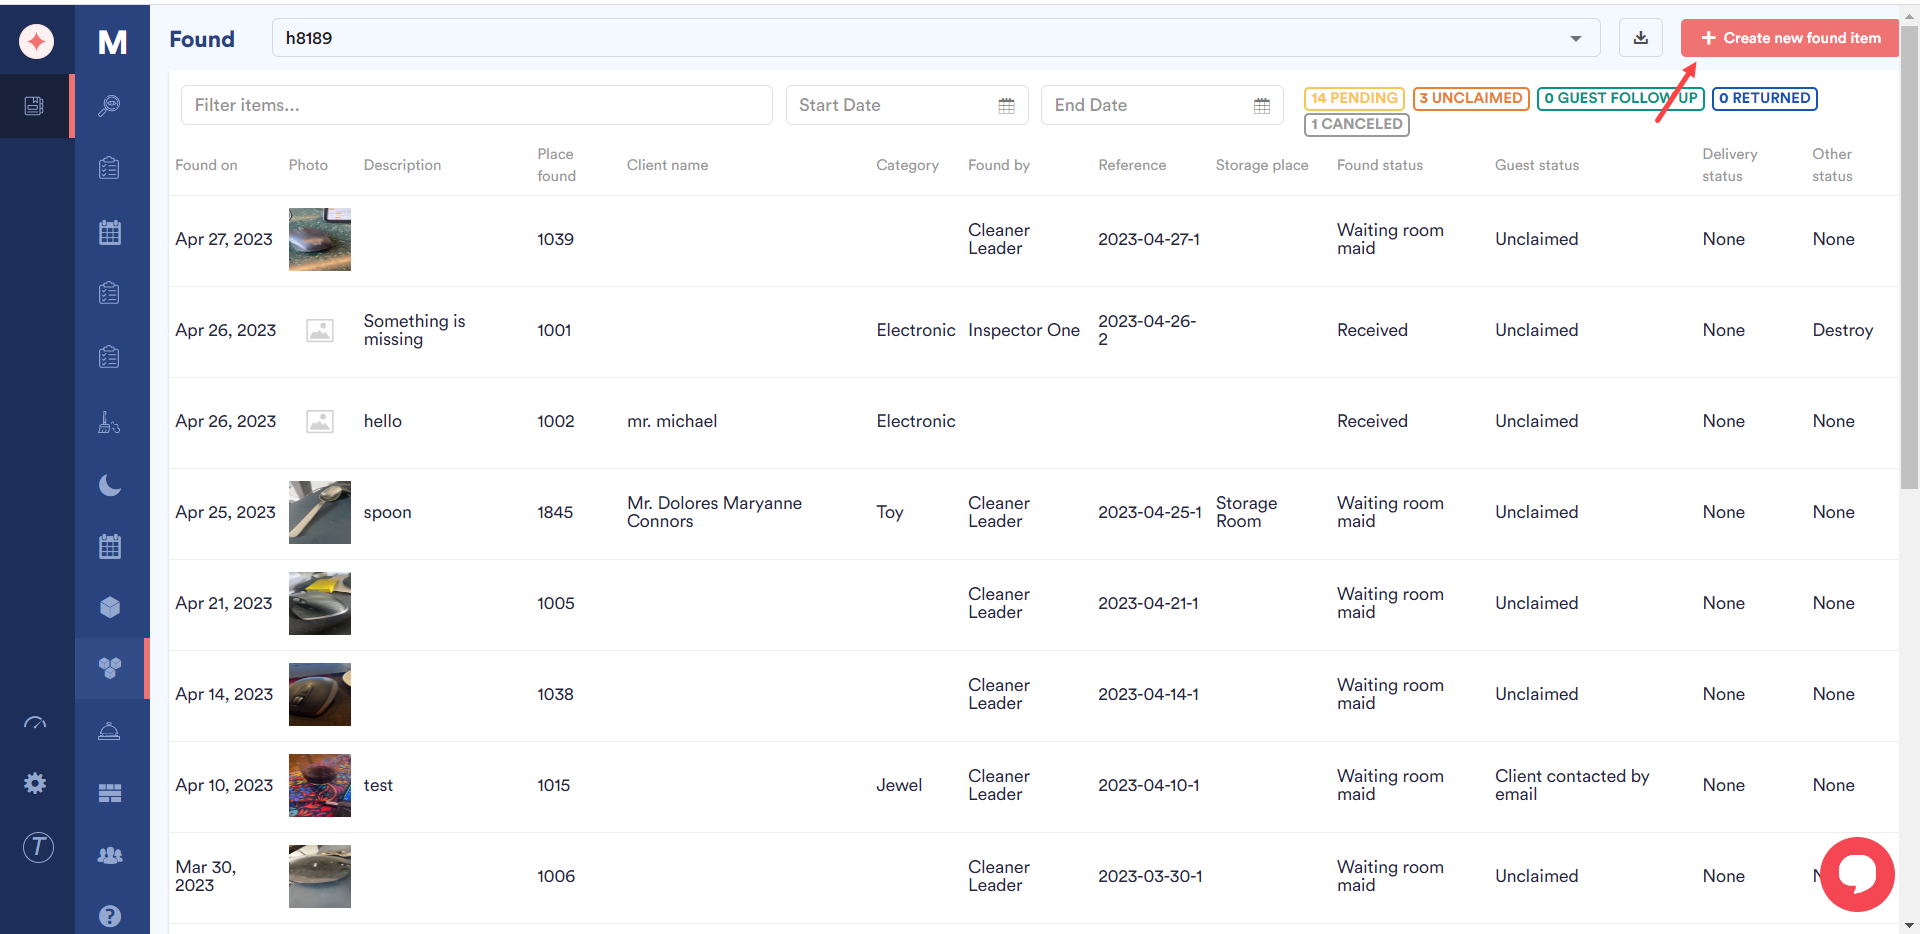
Here, the information for a found item is recorded via four sections that include What is found? (details of the item found), Who found it? (details of the person who found the item), Information (details of where the found item is stored), and Status (status of the found item).
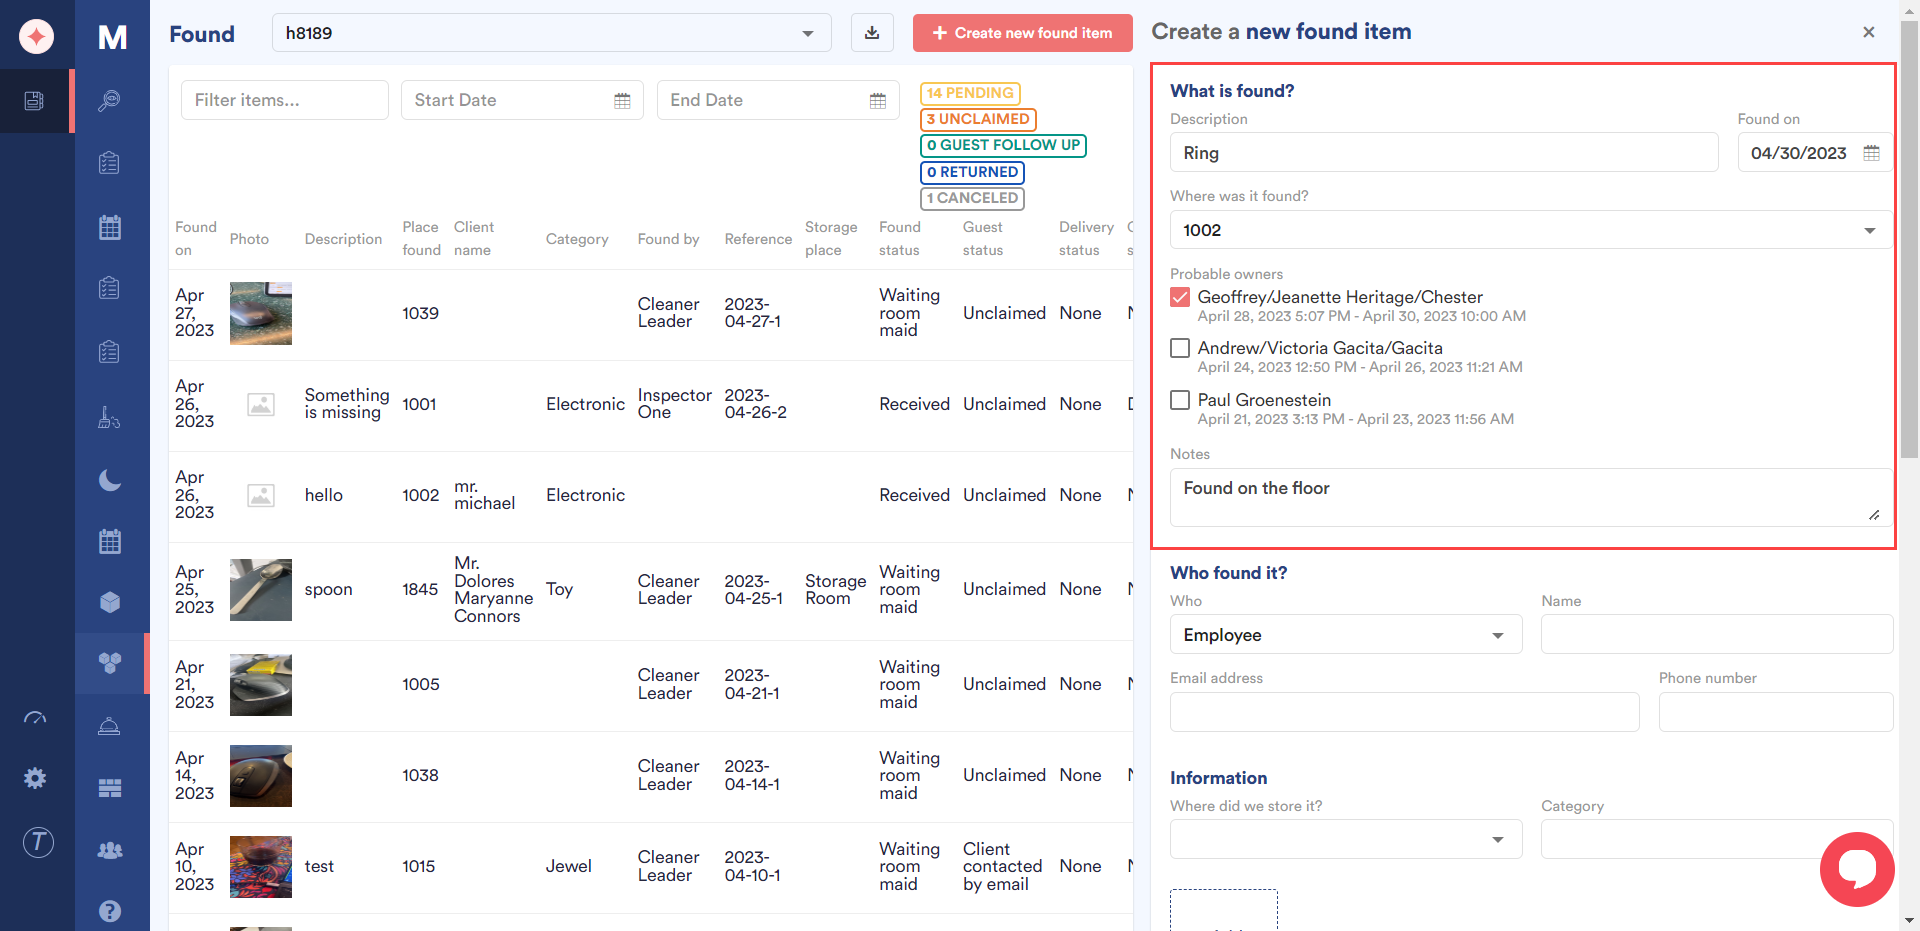
Starting from the What is found? heading, enter the description of the item in the Description field.
Choose the date on which the item was found using the Found On date selector.
Select the place where the item was found using the Where was it found? dropdown.
As the place is selected, the probable owners list is revealed including the people who stayed in the room. You can choose the owner by marking the respective checkbox.
Enter the name of the client in the Client Name field.
Record any additional information using the Notes textbox.
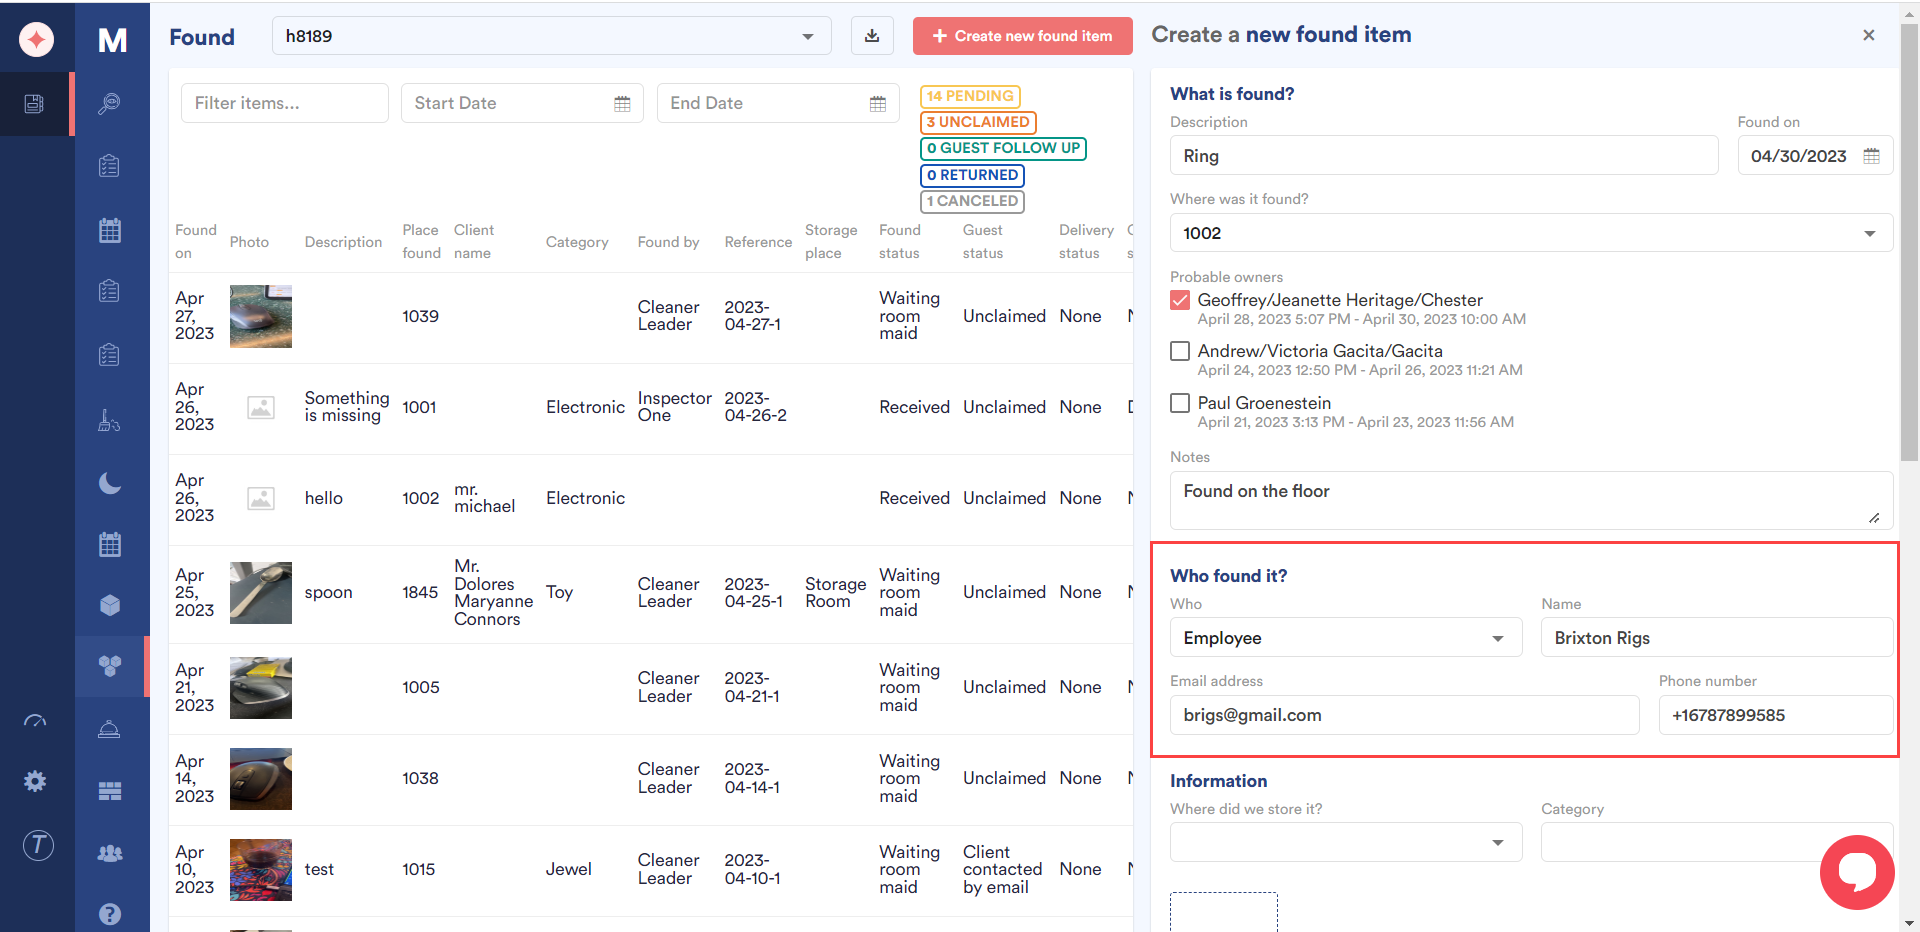
Moving on to the Who found it? heading, select the person who found the item using the Who dropdown.
Enter the name of that person in the Name field.
Use the Email Address field to enter the email address of the person.
Use the Phone Number field to enter the contact number of the person.
Mandatory fields : the category and storage place are mandatory fields
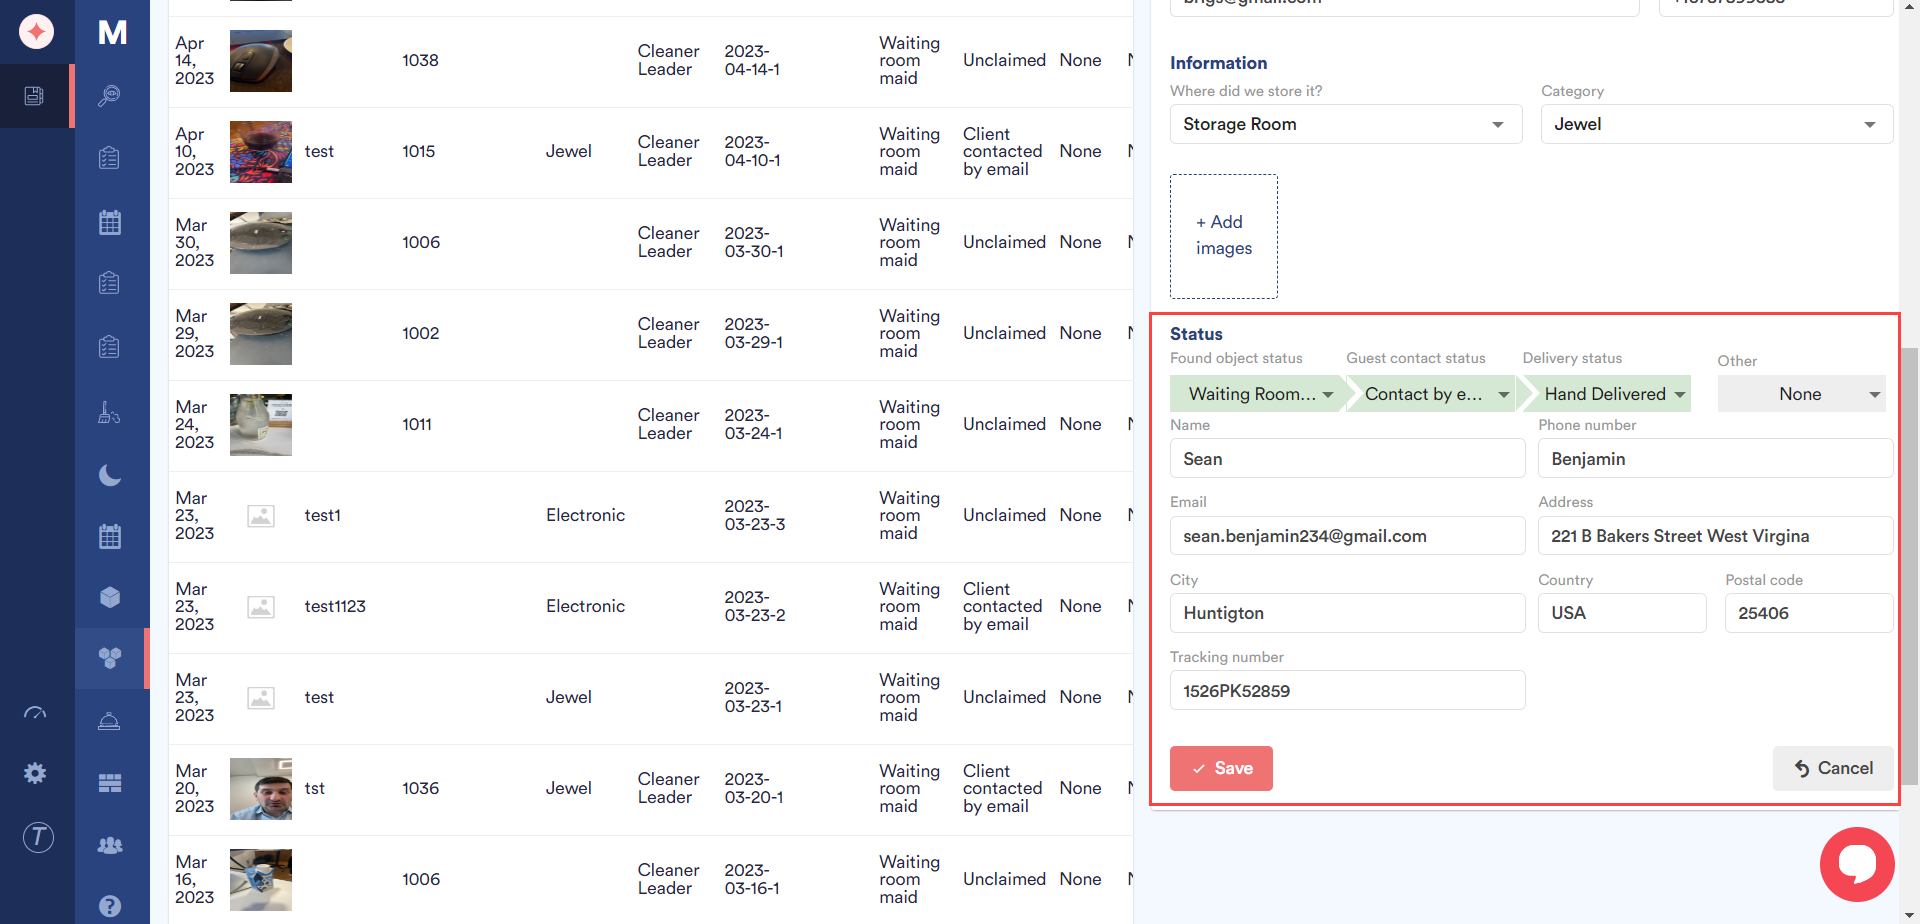
From the Information heading, select where the found item is stored using the Where did we store it? dropdown. You can learn about how to set a room as a Storage Space in the middle of the following article https://www.roomchecking.com/knowlegde-base/found/how-to-record-a-found-item/
Choose the category in which the found item falls using the Category dropdown. Options in this dropdown are populated from the L&F categories module in Settings. You can learn about how a category is created by visiting the How to Create a Lost and Found Category? article.
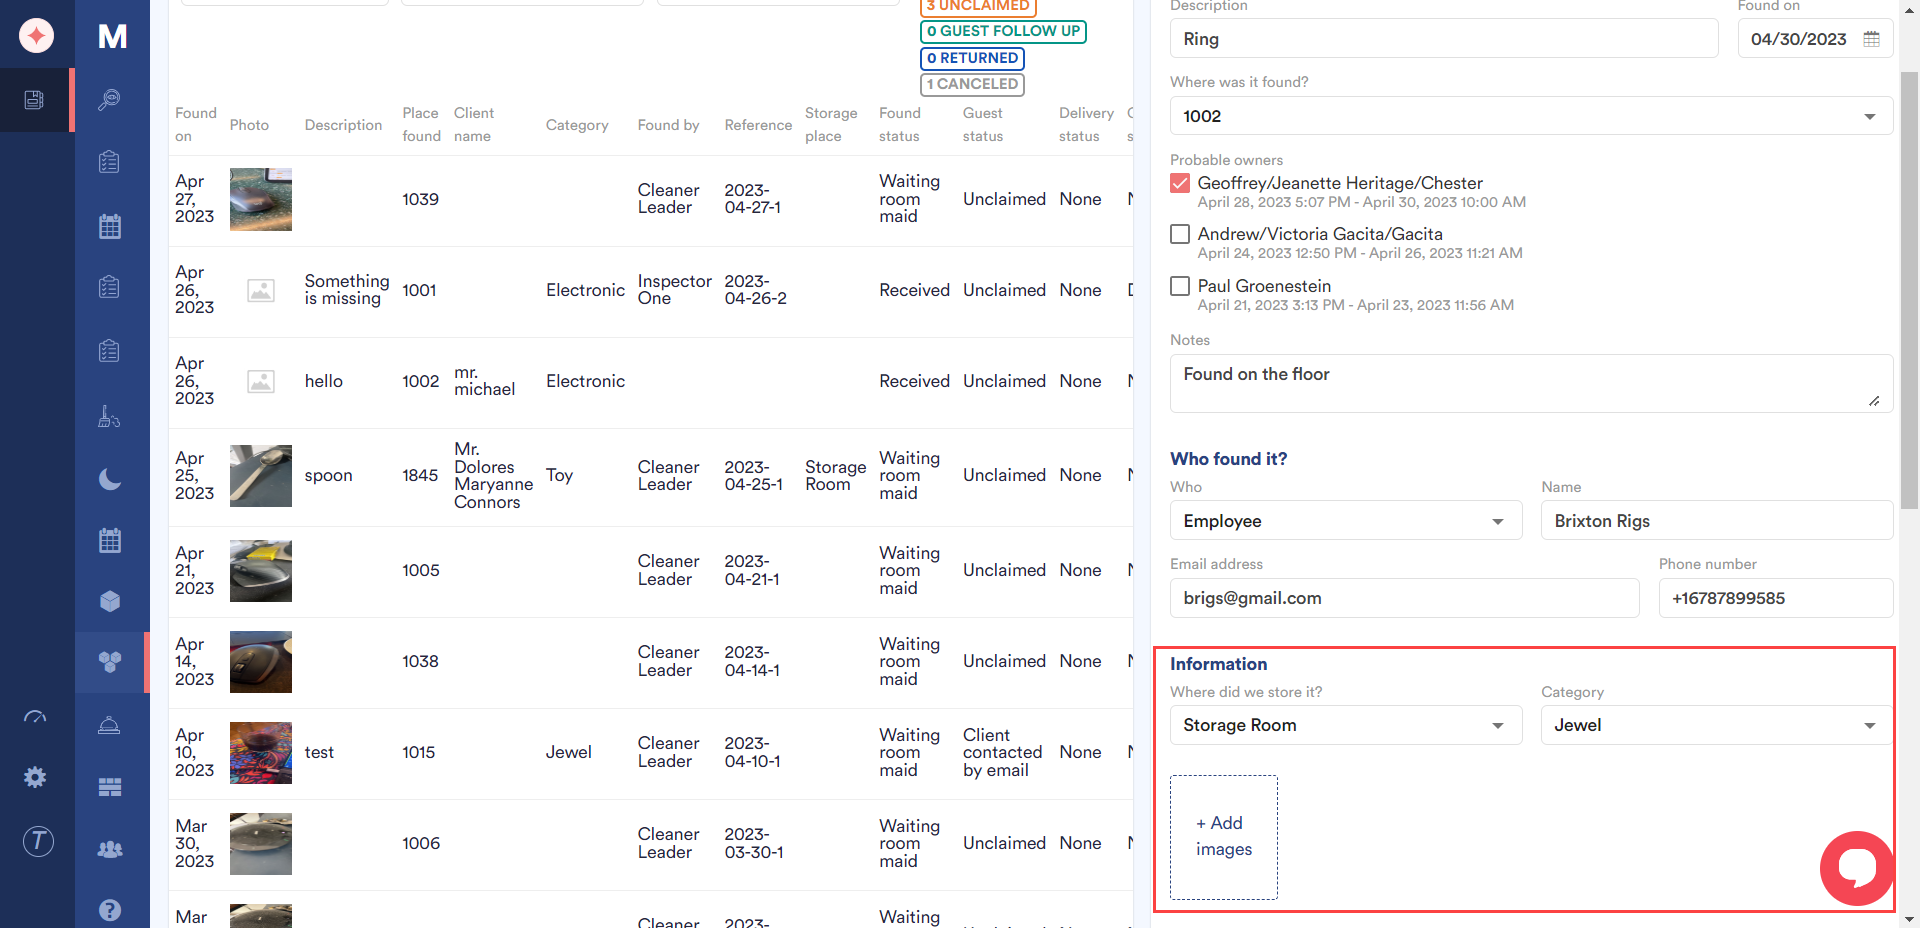
Attach any images from your system storage by clicking the +Add Image button.
Under the Status heading, select the status of the found item using the Found object status dropdown.
Choose the status of guest contact using the Guest Contact Status dropdown. As a selection is made, a number of fields appear in order to facilitate recording the guest details to whom the found item belongs.
Mark the status of the item delivery using the Delivery Status dropdown.
Choose the response from the owner of the found item using the Other dropdown.
Once the selections are made, click the Save button.
Leave a Reply