
HOPR > Left Navigation Bar > Management > Lost Items
Follow the workflow mentioned above to land on the Lost Items screen.
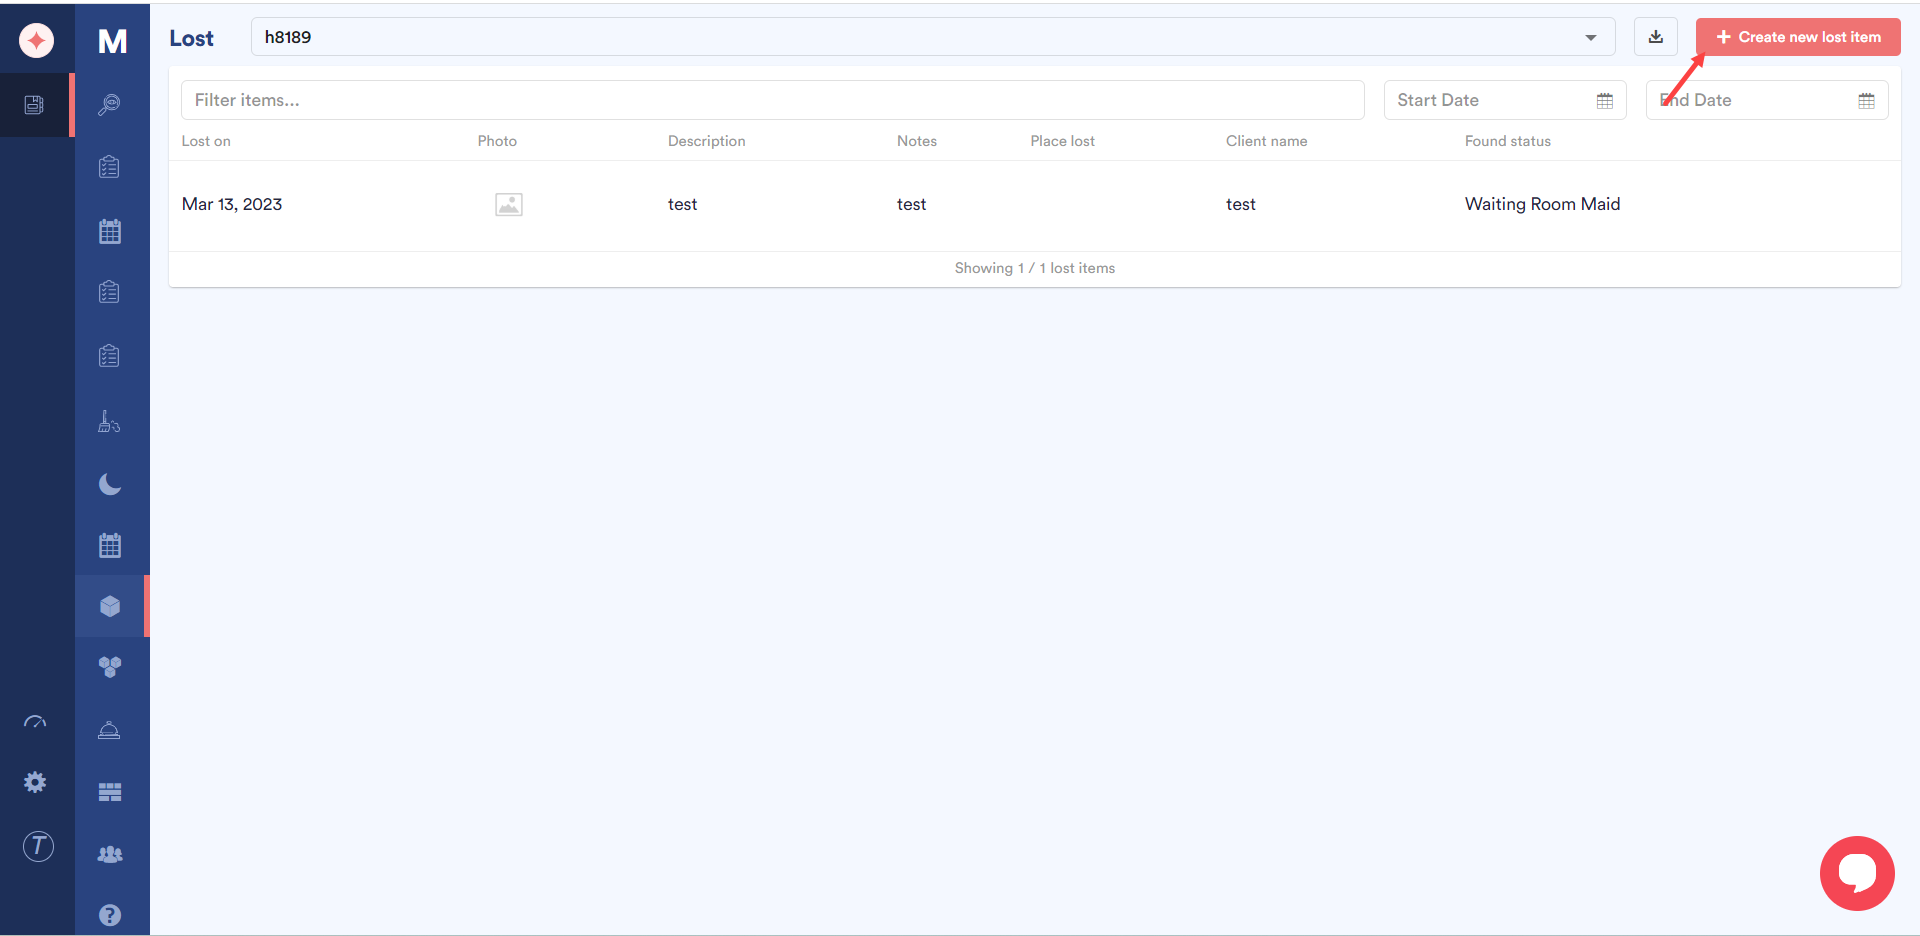
Click the +Create new lost item button located at the top-right corner of the screen. Doing so opens the Create a lost item panel on the right side of the screen.
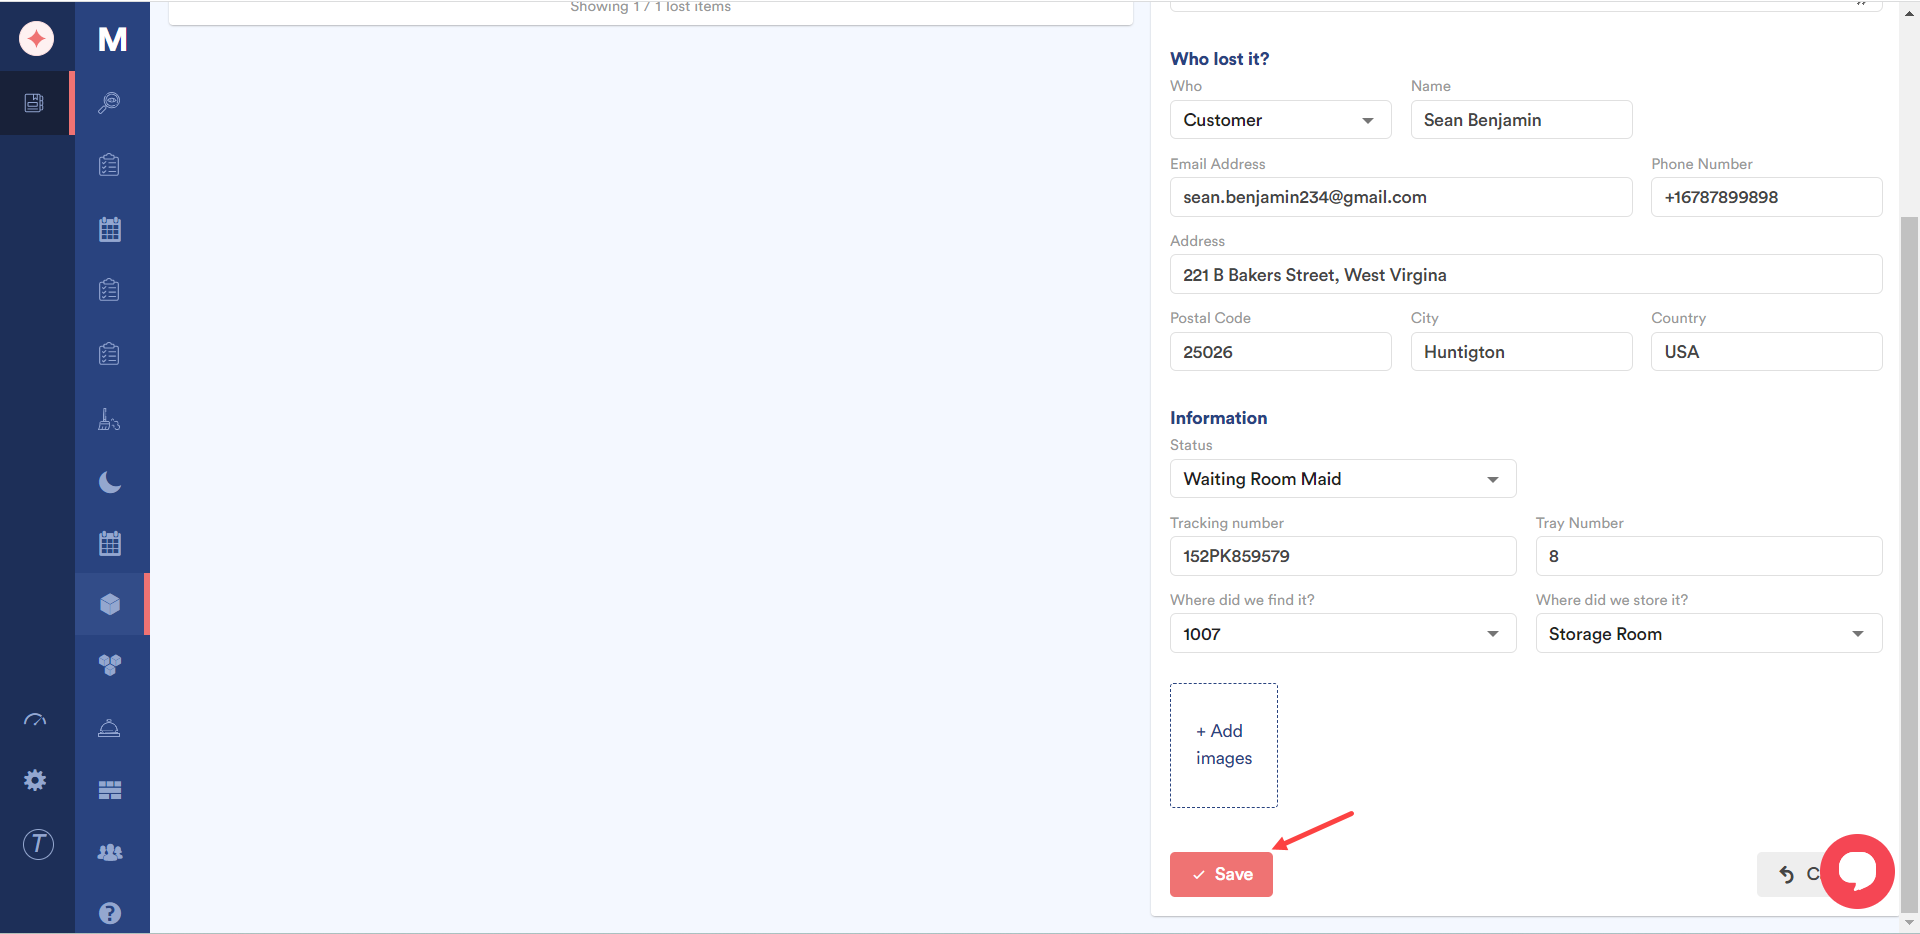
Here, the information regarding the lost item is recorded via three sections that include What is lost? (containing the details of the lost item), Who lost it? (details of the person who lost the item), and Information (status details of the lost item).
Under the what is lost? heading, use the Description field to record a description of the lost item.
Select the date on which the item was lost using the Lost On date selector.
Enter any additional information using the Notes textbox.
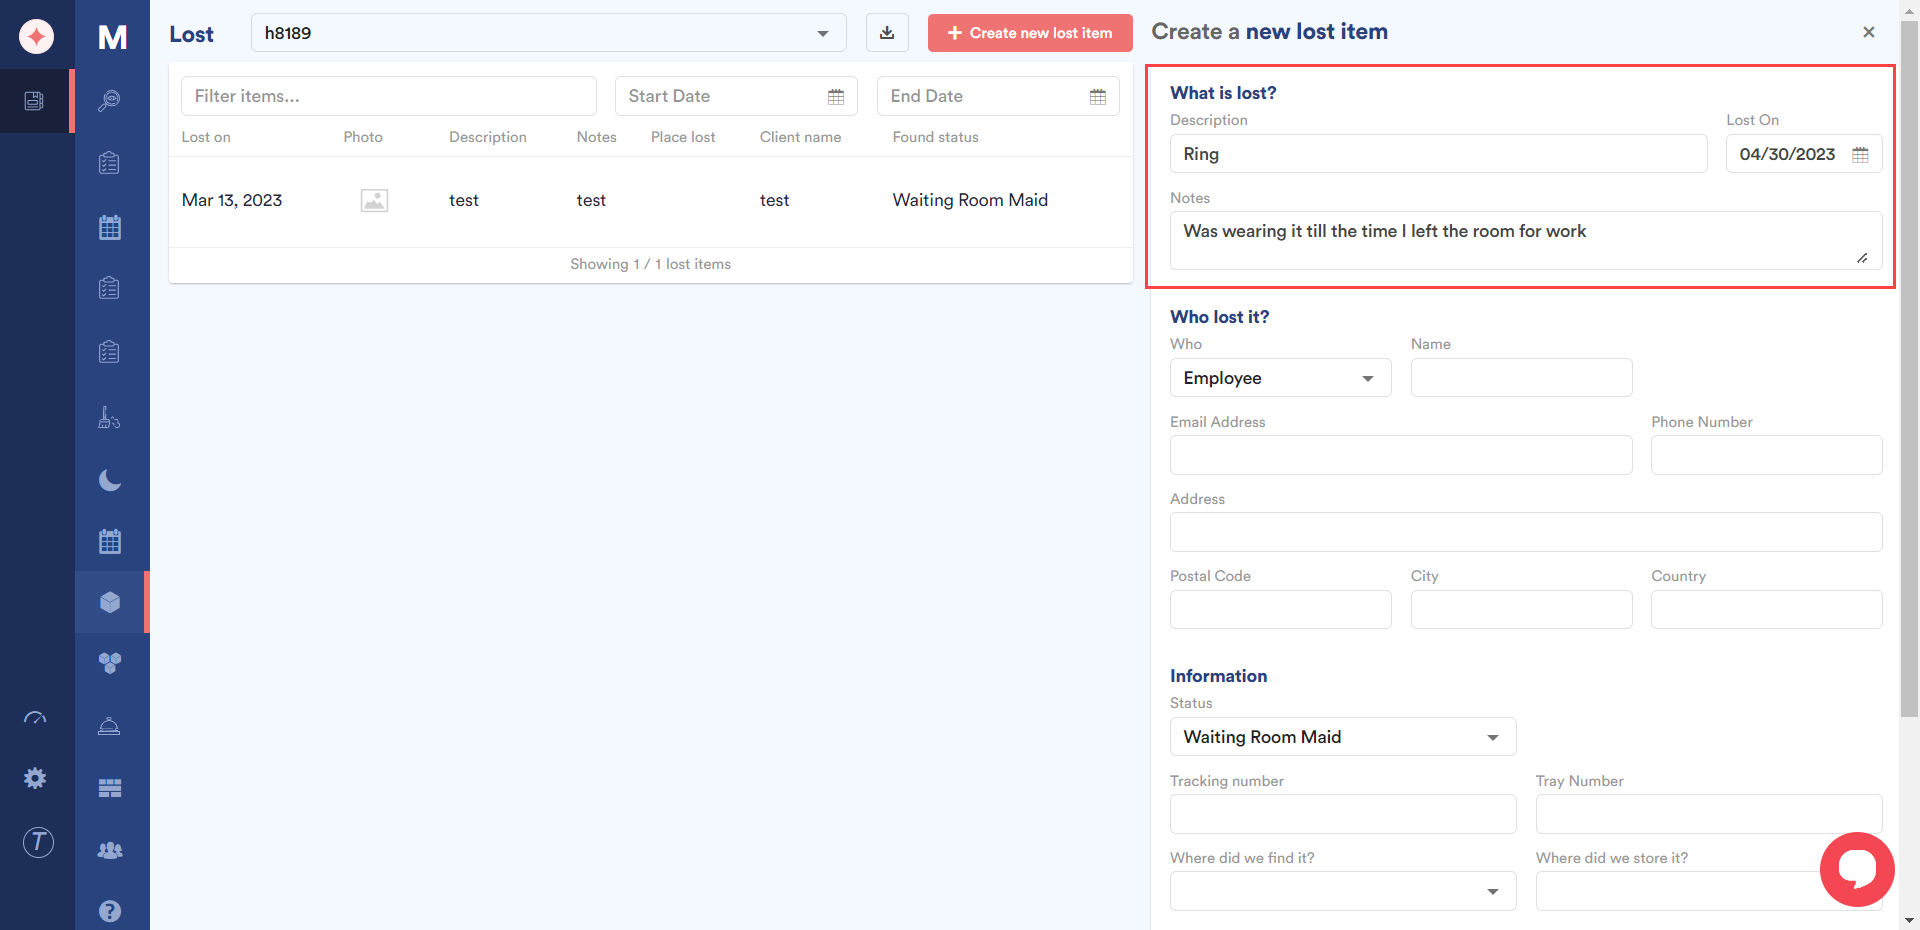
Moving to the Who lost it? heading, choose the person who lost it using the Who dropdown.
Enter the name of that person in the Name field.
Use the Email Address field to record the email address of the person losing it.
Enter the contact number of the person in the Phone Number field.
Use the Address field to record the address of the person.
Enter the postal code of the area of the address using the Postal Code field.
Enter the city name in which the address falls in using the City field.
Enter the name of the country based on the recorded address using the Country field.

Moving towards the information section, select the status of the item using the Status dropdown.
Enter the tracking number for the item using the Tracking Number field.
Use the Tray Number field to enter the tray number for the lost item.
Choose the room in which the item was found using the Where did we find it? dropdown.
Use the Where did we store it? dropdown to select the place of storage for the lost item.
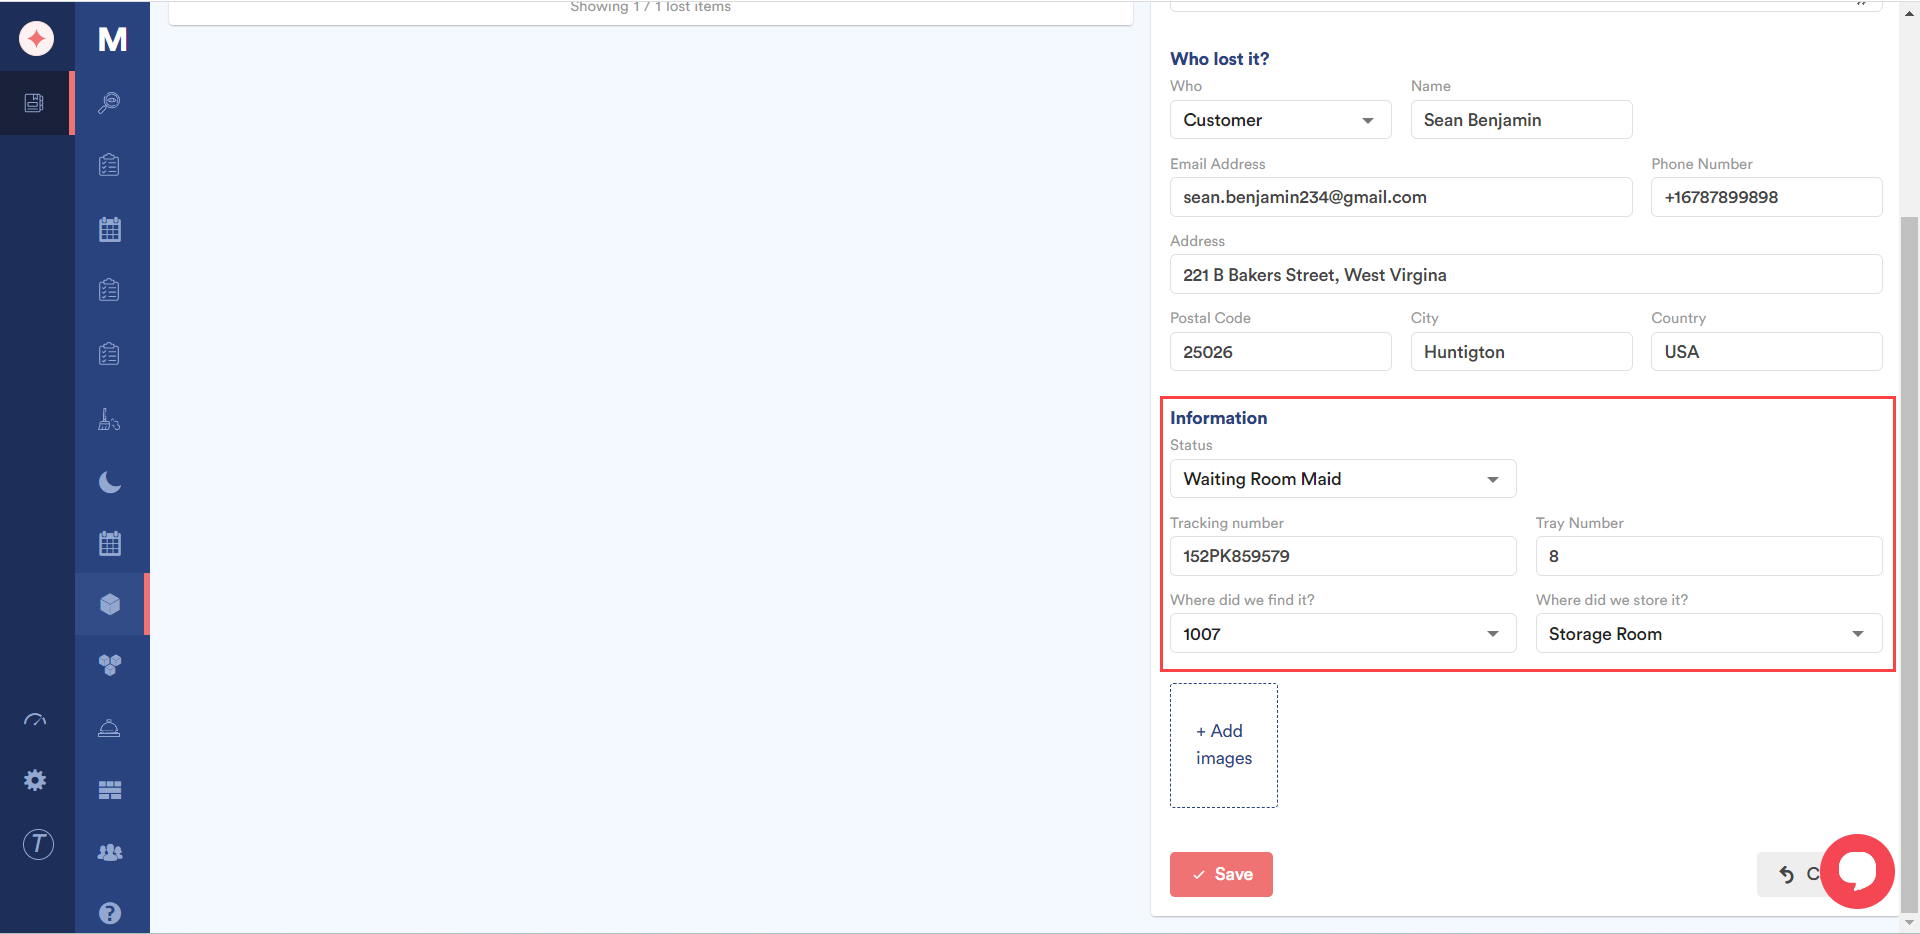
Click the +Add Images button to attach any images for the item from your system storage.
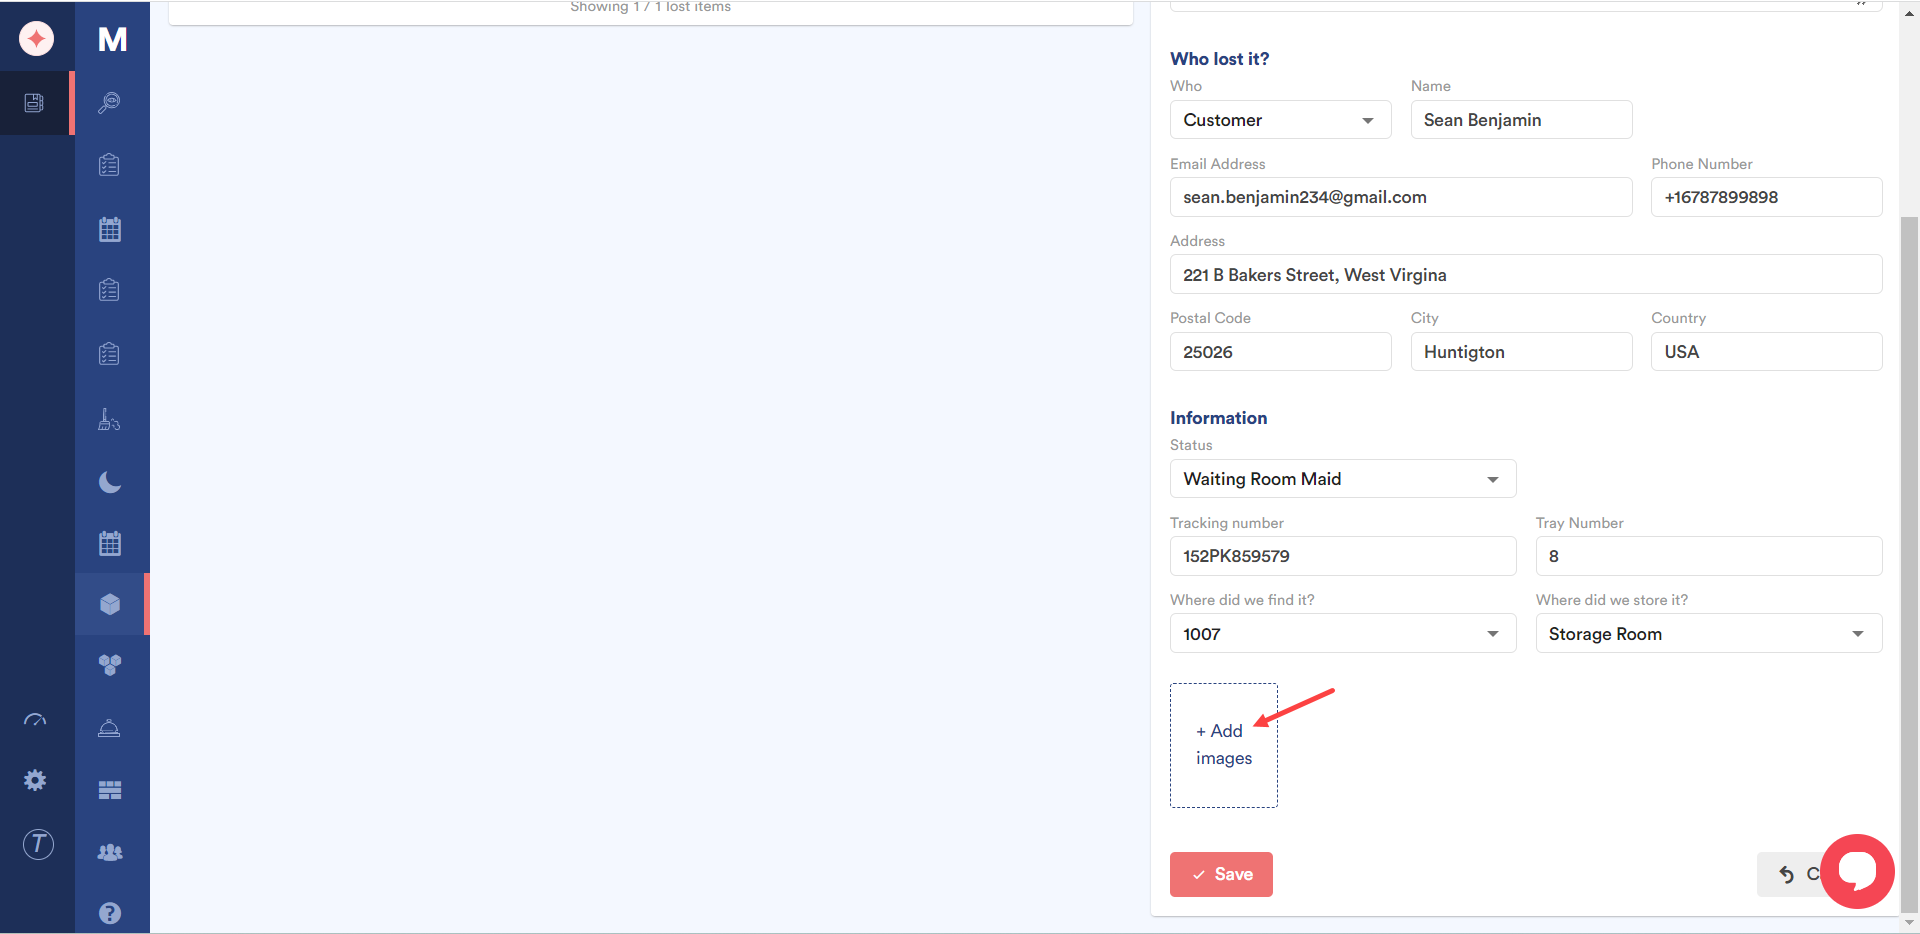
Once the required selections are made, click the Save button. Doing so creates the lost item and lists it in the Lost Items grid.
Leave a Reply